


How to Replace Your Trimmer Line: A Clear Guide for Aussie Gardeners
A whipper snapper is one of the best garden inventions ever. It’s extremely handy for all kinds of jobs, from lawn-edge and flowerbed neatening to hedge trimming and cleaning out light alien garden vegetation. Like any piece of motorised equipment, it needs constant maintenance to keep it working properly and keep you safe.


Summary
- A whipper snapper is one of the best garden inventions ever. It’s extremely handy for all kinds of jobs, from lawn-edge and flowerbed neatening to hedge trimming and cleaning out light alien garden vegetation. Like any piece of motorised equipment, it needs constant maintenance to keep it working properly and keep you safe.
- Regularly trimmer line replacement is one of the main maintenance tasks. It’s pretty simple, but can differ depending on the type of trimmer head you have and your brand. Knowing how to replace trimmer line properly is a skill that will pay off with sharper, more accurate edging and more efficient cutting. It will also help prevent accidents that can happen if the line snaps or gets snarled up in other engine parts.
- One confusing factor is the variety of different trimmer heads that manufacturers use on their trimmers. Each requires a different way of feeding in the trimmer line, and some brands have their own additional quirks.
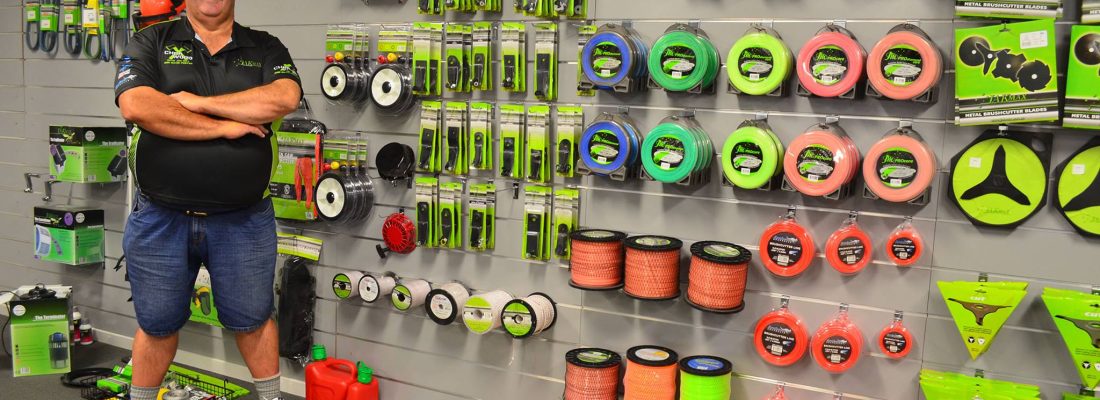
- JAK Max is one of Australia’s most trusted names for trimmer line replacement in Australia, for most major brands. We also stock a wide range of whipper snipper parts and accessories, like filters, fuel line assemblies and trimmer head springs.
Types of Trimmer Heads Explained
Before we tell you how to replace your trimmer line, we need to spend some time exploring the different types of trimmer heads so that you know what line to get and how to put line in your trimmer head.
Manual feed heads
A manual feed head is the classic older type fitted to the first generation of trimmers. These are just as effective today as when they first took the gardening world by storm decades ago. It’s really straightforward to change a whipper snipper line with these models. All you need to do is switch off the trimmer and manually pull out the old line. Then feed in the new line in the same direction.
Bump feed heads
Bump feed heads are the most common type found in the most Australian home trimmers. You might also know them as tap-and-go heads. These allow you to extend the line while the trimmer head is still spinning by tapping the trimmer head lightly on the ground. To replace line on a bump feed trimmer, you usually need to wind the new one around its spool – read below to find out how to do it properly.
Auto feed heads
These are designed to release more line automatically, rather than using the tap-and-go method. It makes them more efficient to use, but when it comes to how to replace the trimmer line, things get a bit tricker. They usually need pre-wound spools, rather than letting you wind the new line onto the same spool. Getting a replacement spool is just easier for this head design. Of course, JAK Max has pre-wound spools ready for you.
Brand-specific heads
Some manufacturers like Stihl, Honda and Husqvarna have their own procedures. For instance, the Stihl FS 38 first requires you to remove the bump knob and trimmer head to access the line spool. By contrast, to perform a Husqvarna string trimmer line change,
you’ll need to open the trimmer head, remove the spool and then reassemble the trimmer head. Honda line trimmer replacement also has its own quirks.
JAK Max keeps a wide range of lines, spools and parts that are compatible with various trimmer brands, so you can get everything you need from us – including our own premium Pro-Diamond Core lines.
Step-by-Step: How to Replace Your Trimmer Line
Setting aside individual brand quirks for the moment, here’s a simple step guide to trimmer line replacement in Australia for the most common, simplest models we use here:
- Step 1: Personal safety is always the first step. If you have an electric trimmer, make sure it’s unplugged. If yours runs on petrol, disconnect the spark plug to prevent accidental starting.
- Step 2: Take off the trimmer head cover. Depending on your model, either unscrew the cap or press on the side tabs to remove it. Then you’ll be able to see the line spool. Inspect it carefully for wear and tear and note the direction in which the line is wound.
- Step 3: Now you can prepare your new line. Consult your manual to find out the correct length you need and cut it accordingly. If you don’t have this information, just ask one of our JAK Max experts when you buy your replacement line. Check how thick it needs to be as well. We sell pre-cut trimmer lines to save you the trouble of snipping them to the right length yourself.
- Step 4: Slowly wind the line onto the spool, in the right direction that you noted previously. Your spool may have directional arrows to help you. It’s important to do this exactly, otherwise the line won’t feed and your trimmer won’t work properly.
- Step 5: Once you’ve fully wound the spool, feed the line through the exit holes in the trimmer head. While keeping the tension firm with one hand, screw or snap the trimmer head cap back on. Test that the line feeds smoothly by gently pulling both ends and checking that there’s sufficient movement.
Now that you know how to replace the trimmer line in most models, let’s look at the slightly more complicated procedure for a bump feed head trimmer.\
How Do You Replace Line on a Bump Feed Trimmer?
To replace line on a bump feed trimmer, you’ll follow virtually the same process. It’s just a tad more complicated because of its spring-loaded spool. This is what extends the line when you tap it on the ground.
Unplug the trimmer (or disconnect the spark plug if it’s petrol-powered) and then open the trimmer head. Remove the spool, unwind the line and clean it. Then cut two equal lengths of trimmer line (again, consult your manual for the exact length). Insert each end into one of the two holes on the spool and neatly wind them around in the right direction, tightly but evenly. Make sure not to overfill the spool. The line shouldn’t exceed the height of the spool brackets.
Tug the lines to tension them and ensure they feed smoothly. Loose or unevenly wound line can jam your trimmer. Now insert the line ends into the exit holes of the head casing and put the head back on.
Do People Soak Trimmer Lines in Water?
You may have heard someone down the pub in a discussion on how to replace trimmer line who swears by soaking lines in water. This is more a myth than a useful tip. Yes, by briefly soaking the line in warm water can make it temporarily more flexible, but won’t do much to improve your trimmer’s performance. They’ve already been designed to use the line optimally without needing any home remedies. You can also break your line if you soak it for too long, especially in hot weather, as the nylon material gets brittle. Rather pass on this one.
When Should You Replace Your Trimmer Line?
Along with how to replace a trimmer line comes the question of when and how often to do it. You’ll probably notice pretty quickly that your trimmer line needs replacing. It could snap while you’re using it, for instance. Bumper feed head and auto feed head trimmers are designed to allow you to release more line if this happens, but if the rest of the line is also damaged this won’t help. Another sure sign that your trimmer line needs replacing is that it cuts unevenly, tearing the grass rather than slicing it cleanly. If you’ve been taking on tougher vegetation, your line is likely to degrade faster too.
Regular trimmer line replacement in Australia is a must, with our often-challenging environmental conditions. It’s a small thing that will pay off well by keeping your trimmer as effective as possible and preventing your motor from taking strain to compensate for loss of cutting ability.
Pro tip: It’s a good idea to keep spare trimmer line in your garage or shed, to save the hassle of having to go out and get more if you pick up problems. Pop into you nearest JAK Max branch to stock up.
Choosing the Right Trimmer Line
You can’t just load up your spool with any kind of trimmer line. You need to consider what you’re using your trimmer for. If you’re only doing light lawn maintenance like trimming edges you can use finer line, roughly 1.5mm to 2mm thick. However, you won’t be able to use it for tougher gardening tasks. So most people choose a medium line, about 2.5mm. This is the best width for general use. If you need to cut through thicker vegetation or clear tough weeds, get yourself a heavier-duty line, at least 3mm wide.
You also need to check the best line thickness for the kind of head your trimmer has. We covered the different head types above, and the more sophisticated ones may need specific line diameters. If the line is too thick it won’t feed properly and if it’s too thin the machine might wear it out prematurely.
When you need to change whipper snipper line, JAK Max offers different lengths and diameters to suit your particular trimmer’s requirements. And if you’re not sure which is the right size to get, we’ll take the guess work out of it.
Common Mistakes to Avoid
Thankfully, there’s nothing that can really go wrong with trimmer line replacement if you follow the steps above. Still, you can make a mistake, so look out for these:
Don’t string the line in the wrong direction – the trimmer heads in different models can spin either clockwise or counterclockwise. If you wind the line in the opposite direction, it won’t feed and your trimmer won’t work properly. Check if your spool has an arrow on it to indicate the direction. If it hasn’t, just remember the direction when you unwind it.
Don’t overfill the spool – don’t fall into the trap of thinking that if you wind extra line onto the spool it will last longer before you need to do it again. In reality, this more usually leads to the trimmer spool jamming as it’s too overloaded to spin freely.
Don’t use the wrong line thickness – if you use a line thickness that isn’t suitable for your task, you won’t get very far, and you could damage your trimmer. Always check the specs in your manual. Or call JAK Max for advice.
Need a Replacement? JAK Max Has You Covered
Whether its trimmer lines, spools or cordless trimmer line refills, JAK Max has everything you need to keep your whipper snapper in top order. They’re designed for durability, and we keep a wide range to stay compatible with major brands. We have an extensive Aussie dealer network.
And if all you need is some quick advice on how to restring a trimmer in Australia for your specific vegetation conditions, just ask.
Explore our aftermarket trimmer lines and trimmer heads.
Featured products
Our featured selection highlights the must-have inventory for your business. These fast-moving parts, high-performance accessories, and key whole goods are currently in high demand among all our customers!


Support Plate, Left – Suits – Greenworks 60v – 7404907AU 30″ MINI RIDER
Support Plate, Left – Suits – Greenworks 60v – 7404907AU 30″ MINI RIDER
PART NUMBER
R0208884-00
 IN STOCK
Tube, Oil Drain – Suits RATO R4000iE-R
Tube, Oil Drain – Suits RATO R4000iE-R
PART NUMBER
JMRT2983
IN STOCK
PUMP ASSY, GASOLINE – Suits RATO R300
PUMP ASSY, GASOLINE – Suits RATO R300
PART NUMBER
JMRT2428
 IN STOCK
Archer Chainsaw Bar – 16″, 3/8″, .063″, Laminated, D025
Archer Chainsaw Bar – Size: 16″, Pitch: 3/8″, Gauge: .063″, Bar Type: Laminated, Mount: Oregon…
PART NUMBER
16A3-LS-SN
 IN STOCK
Pulley
PART NUMBER
PIFBB126598A
 IN STOCK
Axle Bush
PART NUMBER
JM1615
Related articles


How to Choose the Right Brush Cutter in Australia – and Keep It Running with Quality Spare Parts
With our varied terrain, the matter of how to choose the right brush cutter in Australia isn’t as straightforward as…

How to Sharpen a Chainsaw Like a Pro (With Tools You Can Trust)
Chainsaws cut cleanly – if they’re sharp. To get the best performance out of yours, you need to know how…

How To Replace a Lawn Mower Blade: A Practical Guide for Aussie Homeowners
You might think that lawn mower blade replacement is a complicated affair, but it’s actually pretty simple to change a…

What Type of Oil Should You Use in a Lawn Mower?
It’s essential to choose the right lawn mower oil type to maintain optimal performance and longevity, and reduce the risk…
Ultimate Guide to Buy a Log Splitter (Australia)
A log splitter is the best tool for efficiently processing wood, with a range of power choices, depending on your…

How to Gap Lawn Mower Spark Plugs for Optimal Engine Performance
As with any internal combustion engines, spark plugs are essential elements of a lawn mower. They play the same role,…